

Freehand polygon
This graphic permits you to draw any polygon closed or open, it's similar to line. To use it click to indicate all points of the polygon, double click to indicate the last point of the polygon.
To close a polygon the first and the last point in the points list must be the same.
If you set the opaque property to true, the polygon is automatically closed adding a point to the end equal to the first point. If you set opaque to false, the polygon doesn't revert back to open; but just delete the last point and it comes back to open.
Basic Properties[]
- Name
- tool tip
- Style: you could change the style of the graphic object, for example from rectangle to oval, but I discourage you to do so. every graphic has its characteristics and you could create big bugs in you software changing it.
- Style options:
- visible: if it's set false, it's invisible. When an object is invisible use the stack browser to edit it.
- opaque: if it's set false, it has the same color of the background
- Disabled
- show name: if it's set false, the name is not shown
- antialiased: Specifies whether the edges of the graphic object should be smoothed or not.
- border size
- border dashed
- Starting arrow: pointing out from the first point you clicked
- Ending arow: pointing out from the last point you clicked
- Points: it contains any number of points (x,y) separated from a return char like: 120,68
224,134
20,20
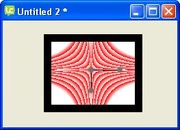
- Markers: marker are another freehand polygon that can indicate any point of the freehand polygon, see the next example:

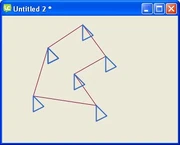
- draw sape at vertex: activate markers
- marker line thickness
- filled: set true to fill with a color the inner part of the markers
- points: points defining marker shape. Points are relative to the freehand polygon points, point 0,0 here means starting point of the freehand polygon.
- Layer mode
- Behavior
Gradients[]
Gradients property permits you to set special fill effect to your graphic. The gradient can be applied to the inside fill or to the border fill, or both.
The gradient property windows is like the following image:

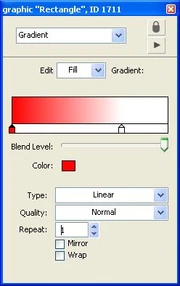
Clicking on the thumbs you may select starting or ending position of the gradient, colors of the gradients.
You can add thumbs and colors with double click on the thumb bar.
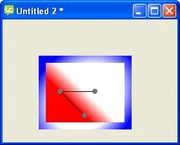
You can change gradient orientation and position moving directly on the graphic the gray and round holders, like the following example:

Gradients can be linear, radial, conical, diamond, spiral, XY and SQRTXY:
")
")
")
")
")
")
")
You can select also gradient quality: normal or good
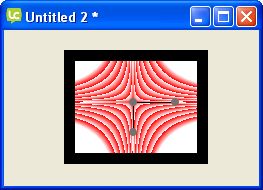
Yo can select also the number of repetitions, the following gradient is repeated 7 times:
You may also mirror and wrap the gradient. Wrap means that the excessive part of the image is reflected inside the graphic.
Colors & patterns[]
Here you can set the color of various elements of the button. You can choose a pattern instead of a color.
Custom properties[]
Custom properties are the best replacement for variable in Livecode. You can use variables in Livecode, but usually they are just temporary; on the contrary custom properties are real containers for all your data. Easy to recover and to check.
Geometry[]
See Geometry manager
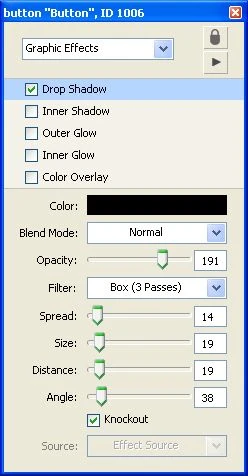
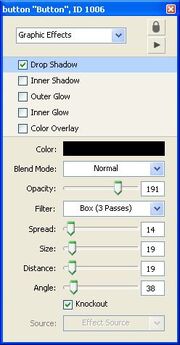
Graphic effects[]
Here yo can activate and mix many effects:
- drop shadow
- inner shadow
- outer glow
- inner glow
- color overlay
If you activate the drop shadow, you can manipulate all aspects of it (color, opacity, position, etc.) with the submenu.
Blending[]
The blending effect is a way to make the object transparent, you can choose between many way to render the resulting object (arithmetic, subpin, etc.). You can choose the percentage of blending your object with the background.
Property profiles[]
All the property of an object are inherited from a master profile, however you can add and change profile. This way all objects will have the same properties, will look the same or act the same.
Size & Position[]
Here you can
- specify the size of the object
- fit it to text content
- set location using the center of the object or its borders
- lock size and position
- choosing which element is above the others, specifying object layer
Text formatting[]
Here you can change:
- font type
- font size (you can enter size directly, you are not restricted to the few showed)
- font style:
- plain
- bold
- italic
- underlined
- boxed
- boxed 3D
- link
- stroked
- alignment
- margins
You can also change all letter to uppercase, lowercase or else using tha last button.